Enhancing 2D sprites with 3D shader techniques
In a previous post I touched on using post process shaders to fake a common 3D effect; ambient occlusion. Recently I've extended this line of thought by applying procedural mapping techniques, usually found in 3D games, to 2D sprites in real time. Procedural mapping is a technique applied to 3D models, both in real time games and pre-rendered images, whereby several texture maps are used to build up a particular material. Most commonly these materials are composed of a coloured texture which provides the basic detail of a model, a normal map which is used by a pixel/fragment shader to provide pixel-level detail, and other information such as pixel reflectivity or transparency, usually stored in a single channel of a texture map such as the alpha channel. This is a bit of a generalisation, of course, games such as Dota2 employ quite a complex set of maps to create its materials, for example, and high-end rendering packages such as V-Ray are far more complex.
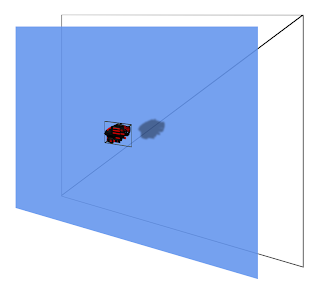
Modern hardware accelerated APIs such as SFML are aimed at creating 2D games and applications but, by their hardware accelerated (in SFML's case OpenGL) nature, are actually 3 dimensional. The 2D effect is achieved with a single quad mesh mapped with a texture the size of the viewport, on to which smaller quads/textures representing sprites are rendered.
This essentially means a sprite is effectively a flat model which can take advantage of programmable shaders like any other 3D mesh. This includes procedural mapping, the possibilities of which I have been exploring, in this case centering specifically on normal and reflection mapping. While developing Threat Level I made most of the sprites by rendering 3D models to a series of stills to create 2D sprite animations. The problem with this approach is that the 3D effect is spoiled when it doesn't react in real time to the lighting around it. It occurred to me that this can be improved upon by using a normal map. These maps are used to modulate the coordinates of texture pixels in 3D space so that any lights within a scene will create reflections and shadows on the material providing much more detail, usually without having to increase the complexity of the underlying mesh. Assuming I had light data within my scene I ought to be able to add some depth to my sprites using this technique. As the sprites were 3D models anyway all I needed to do is render some of the 3D data to bitmaps which could be used for procedural mapping.
To test my theory I first drew up a basic mesh to represent the body of a car as viewed from a top down perspective, common to many 2D racing games. The mesh looks like this:
Ok, so it's not an amazing looking vehicle, but it sufficed for the experiment at hand. From this mesh I rendered a flat colour texture with some soft shadows using ambient occlusion which would form the basis of the sprite and a height map where the colour of the pixel represents the depth of the model in 3D space.
There is some slight artifacting on the 'roof' of the car, but once the sprite is scaled down it's not noticeable. This was enough to try rendering the sprite. Using SFML it takes no more than a few lines of code to produce a demo:
Create a render window
Load the colour and normal textures
Create a sprite from the colour texture
Load the normal mapping shader
Then in the main loop:
Set the shader normal map parameter to the normal texture
Set the shader light position to the mouse cursor
Clear the window buffer
Draw the sprite to the window buffer via the shader
Display the buffer
which in SFML specific terms looks like:
int main()
{
sf::RenderWindow renderWindow(sf::VideoMode(800, 600), "Normal maps, yo");
sf::Texture normalMap, colourMap;
normalMap.loadFromFile("car_normal.png");
colourMap.loadFromFile("car.png");
sf::Sprite sprite = sf::Sprite(colourMap);
sf::Shader shader;
shader.loadFromFile("procedural.frag", sf::Shader::Fragment);
while(renderWindow.isOpen())
{
//poll input
sf::Event event;
while(renderWindow.pollEvent(event))
{
if (event.type == sf::Event::Closed)
renderWindow.close();
}
//update shader
shader.setParameter("normalMap", normalMap);
shader.setParameter("light", sf::Vector3f(sf::Mouse::getPosition(renderWindow).x, 600.f - sf::Mouse::getPosition(renderWindow).y, 0.04f));
//draw
renderWindow.clear();
renderWindow.draw(sprite, &shader);
renderWindow.display();
}
return 0;
}
I won't include the shader specific stuff here as it's not complete, but there are plenty of resources to get you started on your own. Here's the demo in action:
As you can see the shadows cast on the sprite move realistically as the light and the sprite move around the screen, an effect I am personally very pleased with. You may have also noticed in the video that I didn't just stop at normal mapping - I took the procedural idea one step further by adding a reflection map to the demo and extended the shader to draw it on the sprite (I have further plans along this line, hence the unfinished shader). The reflection map is an image of some clouds which offer a vague representation of the sky and is passed to the shader via another uniform sampler2D variable. The most important thing about the reflection texture is that its coordinates have to be offset relative to the position of the sprite in texture coordinates, so that the reflection map appears to stay still relative to the sprite's motion. Modulating the reflection map onto the sprite is then done using the information stored in the normal map's alpha channel. This is convenient because the normal map relies only on the RGB channels to represent XYZ pixel coordinates so the alpha channel of a 32bit map can contain, in this case, reflection values (it is not uncommon to store other data such as transparency in the alpha channel of an image). As the only parts of the sprite I wanted to appear reflective were the vehicle's windows I drew the alpha channel by hand.
The alpha channel is easily accessed in the shader like so:
float blendAmount = texture2D(normalMap, gl_TexCoord[0].xy).a;
and then used to blend the colour and reflect maps with the GLSL function mix()
gl_FragColor = vec4(mix(colourMap.rgb, reflectMap.rgb, blendAmount), colourMap.a);
for the final result: a 2D sprite which seemingly reacts to 3D lighting.
Update: the full source for the finished shader can be found in this post.


This comment has been removed by the author.
ReplyDeleteThank you for sharing about 3D modeling services .The concept you shared about enhancing two dimensional sprites with 3D shader is very interesting.
ReplyDelete